


This pattern will fit a smaller baby with the brim folded up and will ‘grow’ with the baby by folding the brim down, as modeled by the balloon. Mother and baby-tested and approved! Stays on well, too.
Generic instructions:
Start with soft washable yarn.
Take the stitch gauge of your yarn per inch (i.e. 5 stitches per inch for worsted weight) and multiply by 12 for a term baby hat, by 10 for a roughly 34-week preemie hat. (Probably by about 15 for a 6-month-old.) Round off to the nearest multiple of 6. Cast on stretchily that number of stitches (I use long tail cast on for this). Join to knit in the round, using whatever needle configuration you prefer and whatever size you need to get gauge. Note: A looser, more drapey knitted fabric will stretch better and fit longer; a denser knitted fabric will be suitable for an outdoor cold-weather hat. Place marker at beginning of round if desired.
Knit two rounds, purl two rounds. Repeat the sequence twice for a total of12 rounds.
Now knit every round. Knit for 4 inches total length (including brim) for a preemie, 5 inches for a newborn term baby, 6 inches for a 6-month-old.
Decrease rounds: My favorite decrease for hats is to decrease 6 stitches every other round until you have half or less than half the original number of stitches on the needle. Then decrease every round until you have 6 stitches left; break yarn, draw through remaining 6 stitches and bring yarn to inside; knot once and weave in ends. You may pom-pom if you wish, but it’s not necessary. This gives a neat, nicely rounded crown.
More detailed decrease instructions if you need them: Divide the number of stitches by 6 (you have a multiple of 6, remember?). For example, if you have 66 stitches, you will have 11 in each decrease section. Knit until two stitches before the end of the section (knit 9 in our example), then knit 2 together. Place a stitch marker if desired. (When you read your knitting, you may not need the marker, but it helps at first.) Repeat 5 times to the end of the round. Then knit one round plain. Next round: knit to 2 stitches before marker (8 in our example), k 2 tog, repeat around. Knit one around. Continue to decrease every other round until you have half, or a little less than half, the original number of stitches; in our example, half of 66 is 33. You would end up decreasing until you had 30 stitches, since 33 won’t end up as a number of stitches in a round. After knitting the decrease round in which you hit the magic number of stitches, then decrease every round until 6 stitches are left as above.

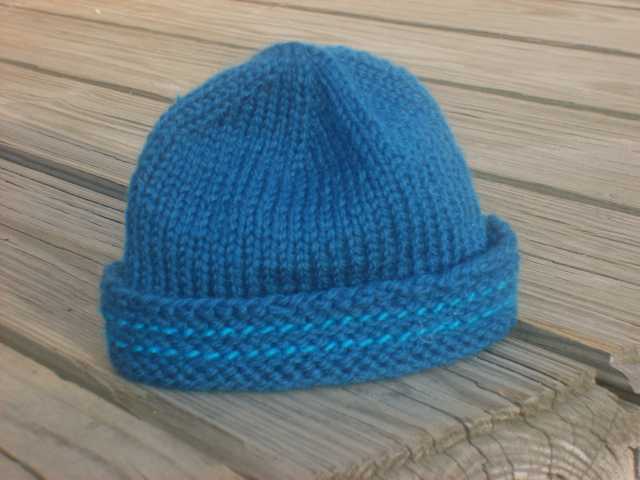
(I made the stripe pattern on the blue hat above by doing the last 2 sets of 2 purl rows in a different color, I believe.)


Pingback: Ran Out Of Yarn In Colorado | knittingclub
Pingback: Weekend (Mess O’) Knitting Update « Hither and Yarn
Hi, Cathy-Cate. I’ve made a top-down version of this cap and enjoyed it. When a gal at church asked me for a seamless newborn cap pattern, I sent her an overview/sketch of how I knit a cap top-down, but also a link to this pattern of yours. We are both knitting caps to send to an OB-Gyn clinic in Afghanistan at which one of our parishioner-doctors is currently volunteering.
I have a request:
Would it be OK with you for me to print out some copies of this pattern for others of our church knitters to use for this project? We’re not fundraising; the caps *themselves* are going overseas. I’m thinking of putting together a packet of a few newborn-sized patterns for folks to choose among, and would like to include yours. What do you think?
Please let me know — after Reinbeck, of course! Have a GREAT time!!
Pingback: Break from Buttonholes « Beautiful Knitting
Pingback: Little Hats for Little Heads « Hither and Yarn
Pingback: Weekend (Knitting) Update (or, Not More Hats, say the Cats) « Hither and Yarn
I am a novice knitter…what size needles work for worsted? I don’t understand what the gauge is for the hat??
I am helping raise money for sick children, any quick free patterns would be very appreciated, thanks x
Hello, thanks for posting a good pattern and clear instructions! I was wondering how long the rim is. I am making a baby hat for a six month old but would prefer not to have a rim that needs to be folded back so I want to reduce the number of inches I knit up before reducing the stitches. Thanks!
The brim is short, itself. It doesn’t have to be folded back to fit, other than a newborn. I would probably take a half inch off the length before decreasing if you wanted to be sure of non-foldingness, though. Good luck! Cathy
Your article is so good I’ve bookmarked it already.
It’s the nice idea and easy to follow, thanks!
I’m a newbie knitter…could you please tell me whether this hat is knit on round needles or two ordinary needles…and what size should I buy? THANKS or your advice!
Hello I am starting a very small hand knit business, mostly custom and mostly through etsy (though the majority of the sales are still local.) I have had several clients ask me to make your hat pattern for them. While not prohibited on your site I wanted to ask before I do it. You will be credited on the main page of the site as well as the listings. I can be contacted at the email address listed on this website.
I have a 6 year old I would love to knit this hat for. How would I calculate the number of stitches needed to make this for my child?
I have a 6 year old and a 9 year old. Would it be possible to adjust this hat pattern to fit their heads? Their heads measure 20.5″ both of them.
I love this pattern and have made it for my daughter and niece when they were younger. I would like to make one for them now and they are 4 and 7. Is there a way to adjust the pattern for bigger sizes?
I was wondering how to adjust this pattern to fit an older child about 5 -8?
�����Фγ��˚ݥե��å����֥��ɥ����ƥब�I���룡�ձ�δ��ɡ��������Ӥʥ֥��ɥ����ƥ�ʤɤⰲ��ُ��Ǥ��롢����ͨ�֥�����Ʒ���ԩ`�˚�NO.1�Υ����ȣ�Ʒ�|���^�� ��Ʒ.2019����Ʒ�֥���T����ĥ��ԩ`,�֥���T�����!
supreme ���å� ����
Pingback: 45 Free Knitting Patterns for a Beanie | Guide Patterns